Knowing your family heritage and tracing your ancestors can be an enlightening experience. Ancestry.com is a fantastic resource for this, with its extensive genealogical databases, sophisticated family tree building tools, and DNA testing to connect you with relatives near and far. Sharing your family tree allows your relatives to join this journey and contribute to a shared understanding of your family’s heritage.
Why Share Your Family Tree?
Sharing your family tree is key to connecting with relatives and expanding your knowledge of your ancestry. It’s how others interested in your lineage can see your work and potentially contribute. You might need to invite people or share the tree with others who are also keen on learning how to find relatives on Ancestry. Creating a free guest account for them can be very helpful for this.
How to Share Your Family Tree on Ancestry.com (Desktop)
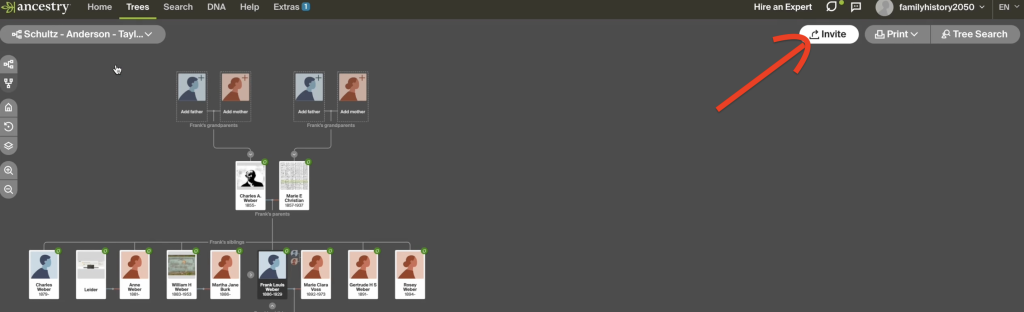
Here’s how you can invite people to view and collaborate on your family tree from your computer:
- Login to Ancestry.com: Start by logging into your Ancestry.com account.
- Go to Your Tree: Navigate to the tree you want to share. You can do this by clicking on the “Trees” tab at the top of the page and selecting the relevant family tree.
- Click on Tree Settings: On your family tree page, find and click the “Tree Settings” option. This is usually found in a drop-down menu when you click on the name of your tree at the top of the page.
- Select Sharing: In the Tree Settings page, there should be a “Sharing” tab. Click on this to go to the sharing settings.
- Invite People: In the sharing settings, you’ll find an option to invite people. You can usually do this by entering their email addresses. Alternatively, you can generate a shareable link that you can send to them.
- Set Permissions: When you invite someone, you can set their permissions. This determines what they can do with your tree:
- Guest: Can view the tree.
- Contributor: Can view and add comments.
- Editor: Can view, comment, and add or remove people.
- Send the Invite: Finally, click to send the invite. The person you invited should receive an email with a link to view your tree. If you chose to generate a shareable link, send this link to them directly.
A quick note on privacy: Remember, by sharing your Ancestry.com family tree, invited individuals can view all the data you’ve added, including information about living people. It’s always a good idea to make sure you have the permission of any living individuals before sharing their details.
How to Share Your Family Tree on the Ancestry iPhone App
Exploring your family’s history, including details like ancestry indigenous Americas, and connecting with relatives is enriching on the go too! With the Ancestry.com app on your iPhone, you can easily manage and share your family tree.
- Open Trees: On the home screen of the app, tap the Trees icon at the bottom.
- Select Tree: Tap on the name of the family tree you’d like to share.
- Access Tree Settings: Once your family tree is open, tap the three horizontal lines (hamburger menu) in the top-left corner, and then tap Tree Settings.
- Invite People: In the Tree Settings page, scroll down to the Sharing section and tap the Invite people button.
- Enter Email: Enter the email address of the person you’d like to share your tree with. You can add multiple email addresses separated by commas.
- Choose Role: Select the role for the person you’re inviting (Guest, Contributor, or Editor).
- Add Message (Optional): You can include a personal message in the invitation.
- Send: Tap the Send button to send the invitations.
How to Accept a Family Tree Invitation
If someone invites you to their tree, you’ll get an invitation via email.
- Check Your Email: Look for an email from Ancestry with the invitation. Click on the link provided in the email.
- Sign In or Create Account:
- If you already have an Ancestry account, sign in. You’ll then be taken to the tree.
- If you don’t have an Ancestry account, you can create one for free to view the tree.
- View Tree: Once you accept the invitation and are signed in, you can view the tree. It will also appear under the “Trees” tab in your account.
Managing Who You’ve Shared Your Tree With (Changing Roles & Removing Access)
Sometimes you need to change someone’s access level or remove their access to your tree. This is also managed in “Tree Settings.”
- Go to Tree Settings: On the top-left corner of your tree page, click the tree name, then select Tree Settings.
- Navigate to Sharing Tab: From the tree settings page, click the Sharing tab. You’ll see a list of people you’ve shared the tree with.
- Change Role/Permissions:
- To change someone’s role (e.g., from Guest to Editor), click on their current Role in the list and select the new role.
- You can also select or deselect the box for “Can see living people” to control their visibility of living individuals in your tree.
- Remove Access: To completely stop someone from accessing your tree, click Remove next to their name.
- Save Changes: Make sure to click Save Changes to apply any modifications.
How to Remove a Family Tree That Was Shared With You
If you no longer want access to a tree someone shared with you, you can remove it from your list.
- Go to Trees Page: Open Ancestry and click on the Trees tab.
- Manage Trees: Select Create & Manage Trees from the dropdown.
- View Shared Trees: On this page, you’ll see different lists of trees. Click on the tab or filter for “Trees Shared with Me”.
- Remove from List: In the tools column next to the tree you want to remove, click Remove from list.
- Confirm: Click OK to confirm the removal.
Will I Lose My Family Tree if I Cancel My Ancestry Subscription?
Good news! No, you will not lose your family tree if you cancel your Ancestry.com subscription. Your family tree and any associated data will remain accessible on your free registered guest account. You just might lose access to some record collections or advanced features that require a paid subscription.
2. Sharing Your Ancestry DNA Results
Are you keen to share your Ancestry DNA results with your loved ones or even explore them on other websites? Sharing your genetic discoveries can be just as exciting as sharing your tree!
Why Share Your DNA Results?
Sharing your DNA results can help you connect with genetic relatives, allow family members to see their own potential genetic makeup through your results, and provide deeper insights when combined with family tree information.
How to Share Your Full Ancestry DNA Results
This allows someone else to see your full DNA results, including matches and ethnicity.
- Sign In: First, sign in to your Ancestry account.
- Access DNA Summary: Click on the DNA tab in the main navigation and select Your DNA Results Summary.
- Go to Settings: From your DNA homepage, select the Settings button, usually located in the upper right-hand corner.
- Invite to View Results: Scroll down to the section for “DNA Ethnicity and Matches Access” (or similar wording like “Sharing Preferences”). Click on Add a person (or “Invite others to view results”).
- Enter Invitee’s Info: In the field provided, enter the email address or Ancestry username of the person you want to invite.
- Set Role & Send:
- You can typically assign a role like “Viewer” (can see results) or sometimes “Collaborator” or “Manager” depending on Ancestry’s current options. Click to change the role if needed.
- Click Send Invitation.
How to Share Your Ancestry Ethnicity Results (Your DNA Story)
If you just want to share a snapshot of your ethnicity estimate (your “DNA Story”):
- Go to DNA Story: Click on the DNA tab and select DNA Story from any page on Ancestry.
- Find Share Option: On your DNA Story page, look for a Share option, often located in the top-right corner.
- Choose What to Share: You might be able to select a specific image or summary you like.
- Select Sharing Platform: Choose how you’d like to share it (e.g., direct link, social media like Twitter, or Download to Your Computer to save an image you can then send).
How to Download Your Raw Ancestry DNA Data
Downloading your raw DNA data allows you to have a copy of your genetic information and potentially upload it to other third-party genealogical or health sites (be sure to understand their privacy policies if you do).
- Signing into your Ancestry account.
- Navigating to your DNA Results Summary.
- Going into DNA Settings.
- Looking for an option like “Download Raw DNA Data” or “Download DNA Data.”
- You’ll likely need to confirm your password and acknowledge that you understand the implications of downloading your data.
- The data will usually be downloaded as a .zip file containing a .txt file.
Does Ancestry Share Your DNA With the Government?
This is an important privacy concern for many. According to Ancestry:
- Ancestry prioritizes user privacy and does not voluntarily share customer DNA data with the government or law enforcement.
- Disclosure of personal information only occurs if legally required through valid processes such as subpoenas, court orders, or search warrants.
- Ancestry publishes a Transparency Report which offers insight into their handling of law enforcement requests.
- To get a full understanding of their data protection policies, it’s always best to review their current Privacy Statement and Terms and Conditions on their website.
3. Troubleshooting Common Sharing Issues
Sometimes things don’t go as planned. Here are a couple of common snags:
Invitation Not Received by Invitee (When you sent it)
If you’ve sent an invitation and the person says they haven’t received it:
- Check Email/Username: Go back to your tree’s Tree Settings and then the Sharing tab. Double-check that the email address or username you entered for the invitee is absolutely correct. Typos happen!
- Check Spam/Junk: Ask your invitee to check their spam or junk mail folder. Sometimes these emails can get filtered.
- Re-invite: In the Sharing tab, next to the person’s pending invitation, you should see an option to Re-invite (often in a “Tools” column or similar). Click this to send the invitation again.
Invitee Did Not Receive Your Invitation (When someone sent it to you)
If someone says they’ve invited you to their tree or to view DNA results, but you can’t find the email:
- Check Spam/Junk: Make sure it hasn’t landed in your spam or junk folder.
- Correct Email Address: Confirm with the sender that they used the correct email address associated with your Ancestry account (or the email you typically use).
- Contact Sender: Ask them to try re-sending the invitation.
- Ancestry Blocking Emails? In rare cases, an email provider might block emails from Ancestry. If you suspect this, you might need to add Ancestry to your email’s safe sender list or contact Ancestry support if the issue persists across multiple attempts.
A Note on Merging Family Trees
You might wonder if you can automatically merge two different family trees on Ancestry (for example, your tree and a tree someone shared with you). Currently, Ancestry does not offer an automatic tree merging feature. If you find individuals in another tree that you want to add to yours, you typically need to add them manually, copying the information from one tree to the other. This can be a detailed process, so take your time to ensure accuracy.
Conclusion
Sharing your family tree and DNA results can open up so many new avenues for discovery and connection. I hope this guide has given you the know-how to confidently share your Ancestry journey with others. Now you can easily invite people and collaborate on your shared heritage. If this post was helpful, please consider sharing it with others who might be looking for this information. And if you have any questions, don’t hesitate to leave a comment – I’ll do my best to help out!
Add Comment